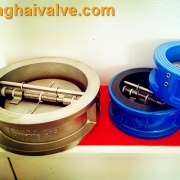
Concentric type Butterfly Valve Installation Manual
- Safety Precautions
Isolate the system: Ensure the pipeline is depressurized and drained before installation to avoid hazards.
Wear protective equipment: Always use appropriate personal protective equipment (PPE) like gloves, safety goggles, and hard hats during installation.
Inspect the valve and pipeline: Confirm that both the valve and pipeline are free from debris or foreign material before installation.
- Tools and Equipment Required
Torque wrench (to the manufacturer’s specifications)
Gaskets compatible with the pipeline and fluid
Bolts, nuts, and washers (as specified by the valve manufacturer)
Flange alignment tools
Pipe support tools
Pipe cleaning tools (if necessary)
- Valve and System Preparation
3.1 Check Valve Condition
Inspect the Valve: Before installation, check the valve for any visible damage, defects, or signs of wear. Ensure the disc operates smoothly by manually rotating it.
Verify Specifications: Make sure that the valve’s pressure, temperature ratings, and material specifications match the system requirements.
3.2 Check Pipeline Compatibility
Flange Condition: Ensure that the flanges on the pipeline are clean, flat, and free of debris. Irregularities in flange surfaces can lead to leakage.
Pipe Alignment: Check that the pipes are correctly aligned. Misaligned pipes can cause the valve to be stressed or damaged during installation.
- Installation Steps
4.1 Positioning the Valve
Disc Positioning: Keep the butterfly valve disc in the partially open position (about 10%) during installation. This prevents damage to the seat or disc and ensures easy centering between the flanges.
Mounting Orientation: Ensure the valve is installed with the flow direction indicated by the arrow on the valve body, if applicable. The valve can be installed horizontally or vertically, but ensure enough clearance around the valve for maintenance and operation.
4.2 Placing the Valve Between Flanges
Gasket Installation: Place a gasket between the valve and the flange on both sides. Use gaskets that are suitable for the valve material and the media being handled.
Valve Centering: Carefully place the butterfly valve between the pipeline flanges. The valve must be centered between the flanges to prevent the disc from contacting the inside of the pipe when opening or closing.
4.3 Bolt Tightening Procedure
Insert Bolts: Insert the bolts through the flange holes and the valve’s lugs, if applicable. Hand-tighten all bolts evenly, starting from the center and moving outward in a crisscross pattern.
Cross Pattern Tightening: Use a torque wrench to gradually tighten the bolts in a crisscross pattern to ensure even pressure across the flange surface. Avoid over-tightening to prevent flange distortion or valve damage.
Final Torque: Tighten to the manufacturer’s specified torque value for the bolts. It is important to follow the recommended torque values to avoid leaks or damage to the valve or flanges.
- Post-Installation Checks
5.1 Operational Test
Check Valve Operation: Manually operate the valve to ensure that the disc rotates smoothly through its full open and closed positions. There should be no interference with the pipeline.
Leak Testing: After installation, test the valve for leaks by pressurizing the system gradually. Check the valve body, flanges, and gaskets for any signs of leakage.
5.2 Pipeline Support
Support Pipes: Ensure that the pipeline is adequately supported on both sides of the valve. The valve should not bear the weight of the piping, especially for larger installations.
- Valve Operation and Maintenance
6.1 Routine Operation
Slow Operation: When operating the valve, do so slowly to avoid water hammer or mechanical shock that could damage the valve or piping system.
Open/Close Position: Ensure the valve is fully closed or fully open during operation, unless being used for flow control.
6.2 Regular Maintenance
Inspection Frequency: Periodically inspect the valve for signs of wear or damage. Pay special attention to the disc, seat, and seals.
Cleaning: If necessary, clean the valve and piping system to remove any buildup that could impair valve performance.
Lubrication: Lubricate moving parts if specified by the manufacturer to ensure smooth operation over time.
- Troubleshooting
7.1 Valve Leakage
Potential Causes: Misalignment of the valve, improper torque of the flange bolts, or a damaged gasket.
Solution: Recheck alignment, adjust the bolts according to torque specs, and replace any damaged gaskets.
7.2 Difficulty in Operation
Potential Causes: The valve may have been installed with the disc in contact with the flange or pipe, or debris may be obstructing the disc’s movement.
Solution: Check the installation for alignment issues and clean the pipeline if debris is suspected.
- Decommissioning and Removal
Isolate the Valve: Before removing the valve, ensure that the pipeline is depressurized and that the valve is fully closed.
Support the Valve: Ensure the valve is adequately supported during removal, especially for large valves, to prevent injury or damage.

 tanghaivalve.com

 © Copyright 2020 Tianjin Tanghaidongyang Valve Co., Ltd. All Rights Reserved.